How to Make Things Float With Ultrasound
Advertisement
Editor’s Picks

Magicians have long made things appear to hover without any visible means of support. For some reason, engineers delight in trying to turn this particular illusion into reality, and we’re no exception at IEEE Spectrum. Back in 2014, for example, W. Wayt Gibbs wrote for us about how to make a miniature disco ball levitate using the power of electromagnetism. But that system works only for objects that can have a magnet attached. So, when I saw a kit promising to make any kind of small object float, even drops of liquid, I knew I had to have it.
The US $70 kit is from Makerfabs and is based on the TinyLev design created by Asier Marzo, Adrian Barnes, and Bruce W. Drinkwater as published in last August’s Review of Scientific Instruments. (Their goal was to create an inexpensive way to examine materials using techniques like spectroscopy without worrying about contamination from a container. My goal is to be able to make something float while cackling, “Behold!”)

The basic operating principle is to set up an acoustic standing wave. Just as with a vibrating guitar string, such a standing wave will have nodes, which are spatially fixed points where the sound’s vibrations are at a maximum. A small object placed at one of the nodes will be held in position, thanks to the momentum imparted by vibrating air molecules.
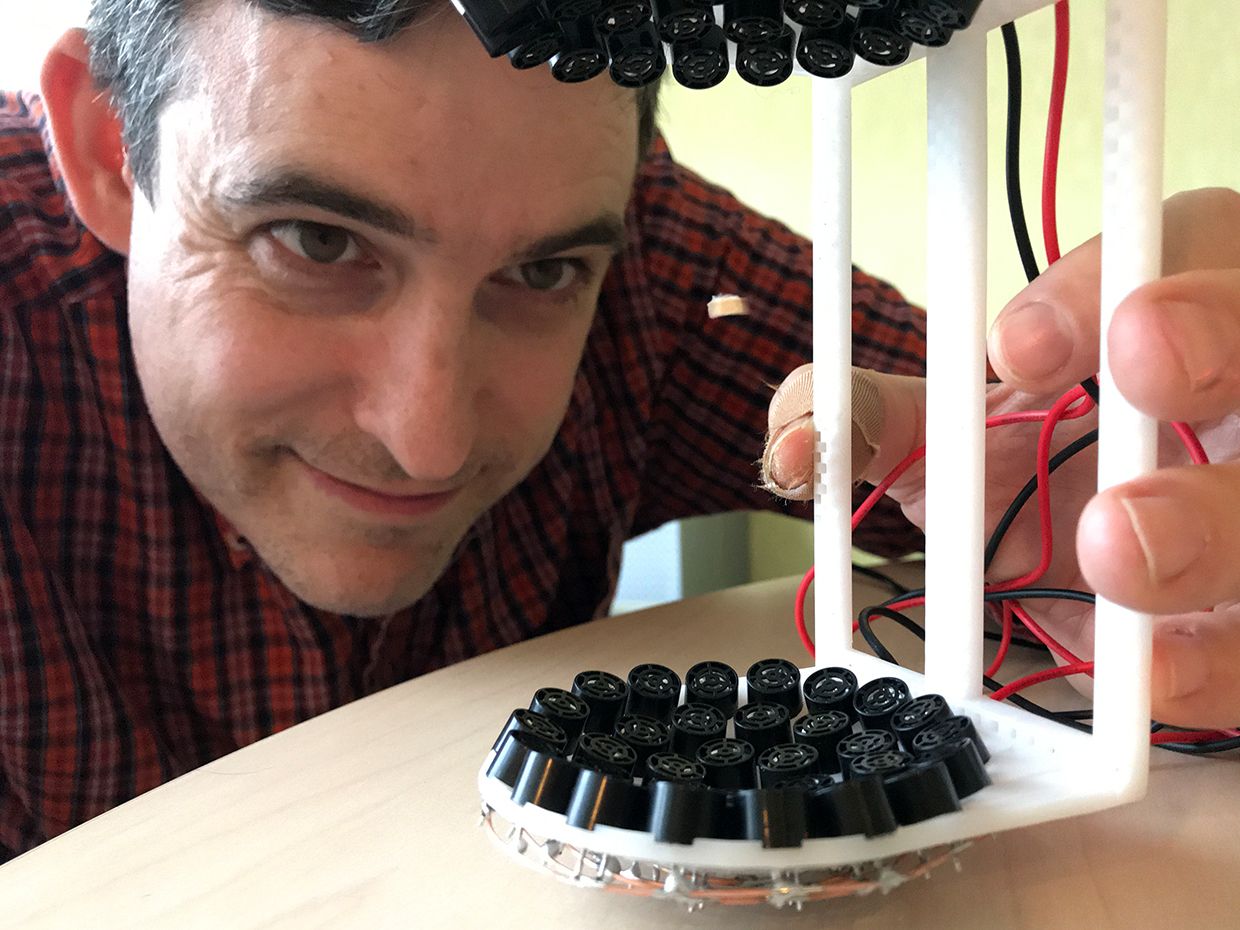
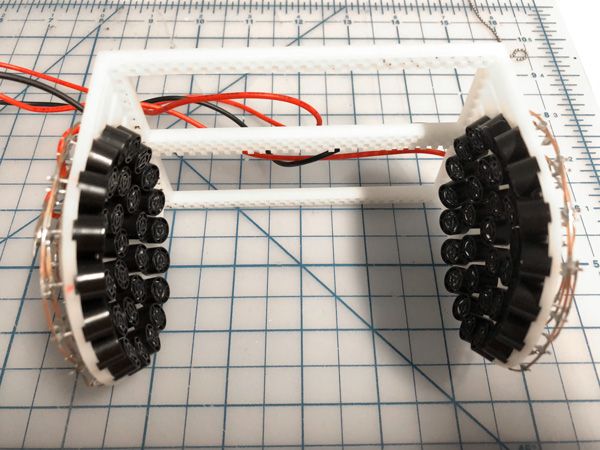
The standing wave is formed by two opposing concave arrays of ultrasonic transducers, with 36 transducers per array. Sound waves emanating from the arrays interfere with one another to produce the standing wave.
Technically, you can create a standing wave using just two transducers pointed directly at each other, but using the arrays has two advantages. First, they deliver a lot more power, allowing for heavier objects to be held aloft and a wider separation between the opposing transducers. And second, the arrays’ curved shape focuses power toward the central axis of the levitator, providing lateral forces that keep levitating objects from drifting sideways out of the node.


Strength in Numbers: I mounted 72 ultrasonic transducers in a 3D-printed frame [top] and then wired them so that they are controlled in sync [middle]. The transducers are connected to a motor driver board that is controlled by an Arduino Nano [bottom].
The TinyLev can lift light objects with a maximum length of about 4 millimeters. The creators have even demonstrated the system with an ant. Their published paper has everything you need if you want to build the TinyLev completely from scratch, including files for 3D-printing the frame that holds the arrays, but you can save yourself a lot of trouble by buying the Makerfabs kit. In particular, the frame needs to be printed at a fairly high resolution or getting the transducers to fit into their shallow sockets may require a lot of finishing work. In addition to the transducers and the frame, the other major components are an Arduino Nano and a motor-driver breakout board. The motor driver provides the current to power the arrays. The Nano controls the driver by providing 40-kilohertz square-wave timing signals. The Nano can also be used to alter the phase difference between the two arrays, which lets you tweak the vertical position of floating samples.
Makerfabs’ online instructions are taken from the original scientific paper’s supplementary material and include some video. Ideally, I’d like to see Makerfabs reformulate the instructions for its website. As it is, I completely missed wiring one jumper because it was cropped out by the border of one diagram. It wasn’t until later, when I noticed the diagram could be enlarged, that I spotted the missing connection.
But the biggest mistake I made was all my own. Each transducer in an array has to emit a sound wave that is in phase with the rest. The instructions offer two different ways to determine the internal polarity of the transducers, so that they generate waves that are correctly phased when the driving signal is fed to the array. Looking at the transducers, I noted each one had a little “+” symbol by one leg and thus assumed that the transducers used in the instructions must be ones that didn’t have their polarity marked in this way. So, I wired in the transducers with regard to this symbol and hooked up the control circuitry, a straightforward if somewhat lengthy process that also entails downloading and installing control software into the Nano.
But when I turned it on, I realized that no power of levitation was present. Following the troubleshooting section of the instructions, I wired up two extra transducers to an oscilloscope. Using one transducer as a reference and the other as a probe, I measured the phase of the transducers in each array (just as a small speaker can be used as a microphone in a pinch, the transducers can convert ultrasound into a voltage). About a third of my sensors were out of phase, so I had to desolder, flip, and solder them back in.

Once that was done, I tested the array again and, with a bit of trial and error, managed to successfully float a small chip of wood. I built a wooden case to support the TinyLev’s frame and hold the control electronics.
I then tried to levitate everything in reach that was about the right size and weight. Finding the invisible nodes proved tricky. I got my best results from using clumps of sawdust loosely held with tweezers, as it’s easy to see the sawdust twitch when it’s being vibrated. Tiny amounts of sawdust can also help to mark the locations of the nodes when you are trying to levitate something more substantial.
It’s really pretty impressive to see multiple objects levitating at once, each in its own node. And once you do get something to float, the system can be surprisingly stable: I have had objects levitating for several hours, which allows me to indeed cackle, “Behold!” whenever someone comes into my office, without any embarrassing utterances of “Wait, wait, just let me try it one more time....”
This article appears in the May 2018 print issue as “Acoustic Levitation.”
Advertisement
Tidak ada komentar