How To Make An Old Dodge Ram As Good As Its Cummins Diesel Engine
I’m sure we’re all familiar with the saying that “you’re only as strong as your weakest link.” It’s a cliché that can be applied to nearly anything: Sports teams, office environments, school group projects, and, you guessed it, vehicles.
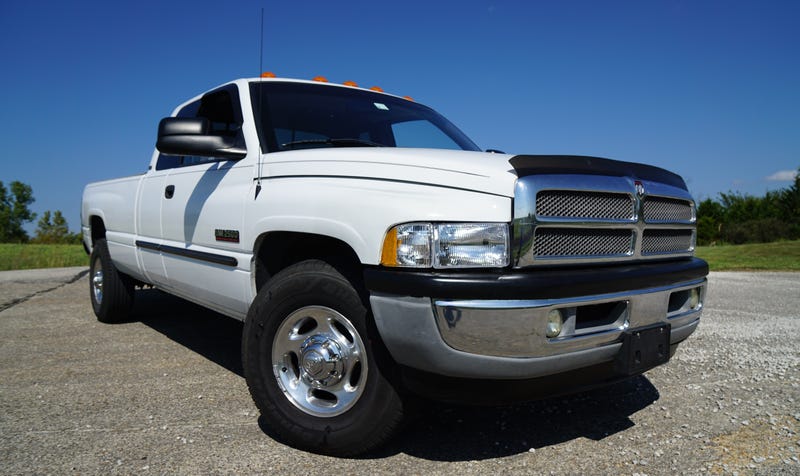
The 2001 Dodge Ram 2500 Cummins turbo diesel pickup truck that I bought a few months ago is a perfect example of an automobile that is only as good as its weakest link. The engine - that wonderful 5.9 liter Cummins turbocharged diesel engine - is far and away the strongest member of the team of parts that comprise the truck.
With its inherently smooth inline-six configuration, iron block construction, and low revving nature, the power plant is as robust as they come. This isn’t to imply the engine is invincible or maintenance free, but it does have a great reputation for reliability when put to work.

If only the same could be said for the Dodge Ram pickups that these engines are put into. As the years and miles continue to add up, these Rams start to show their age in more ways than one.
I’m going to show you how to make a well-used second-generation Dodge Ram as strong as its Cummins diesel engine.
Surveying The Needs
I have to come clean here: I started with a truck that was already in pretty good shape. This is the initial challenge when buying one of these second-hand Rams. Mine had 271,000 miles, but there wasn’t any rust present, the interior was in good condition, and there weren’t any glaringly-obvious mechanical issues.
I bought the pickup from an older couple who used it to tow their fifth wheel RV. This isn’t the ordinary life for many of these trucks, which are often put to use doing less glamorous heavy-duty type of work. While the Cummins engine doesn’t complain, the rest of the truck can quickly become worse for wear.
To combat this downward slide, I went over my truck, system by system, to identify potential weak areas and locate parts that were due for replacement. I divided the maintenance and repairs into these sections:
- Fuel Delivery
- Drivetrain
- Engine
- Suspension & Steering
- Brakes
- Electrical
- Cosmetics & Miscellaneous
With maintenance categories now defined for the truck, let’s dig in and see what needed to be done.
Fuel Delivery
Compared to gasoline-powered vehicles, diesel vehicles are more maintenance-intensive when it comes to the fuel system. Filtration and water separation are some of the key factors at play when maintaining a diesel fuel system. It’s been reported that the stock fuel filtration system on the Cummins-equipped Ram is only adequate at best.
A secondary concern with the stock fuel systems on these trucks is related to the fuel pumps and their associated operating fuel pressures. There are two fuel pumps on this truck. The first is called a lift pump, which is a low-pressure pump that moves fuel from the tank all the way up to the next pump: The injector pump.
The injector pump on the 24-valve Cummins engine is an electronically-controlled unit made by Bosch named the VP44. This pump amplifies the fuel pressure to a few thousand PSI and distributes the charged fuel directly to the injectors for optimized fuel atomization. The injector pump is lubricated by the diesel fuel running through it, so it is paramount that the lift pump maintains adequate fuel flow to ensure the injector pump’s health.
However, the stock lift pump is thoroughly documented as a common failure point on these trucks. When they fail, you’ll not only be stranded at the side of the road, but you may also be staring down the barrel of a $1200 injector pump replacement. Yikes!
Neither the potential filtration or fuel pressure issue left me feeling warm and fuzzy inside. I decided it would be best to fit the truck with an up-rated lift pump and filtration system. I also elected to install a fuel pressure gauge so I could monitor the health of the lift pump in real-time going forward.
Installing the new lift pump and filtration assembly was an all-day ordeal, mainly because I wanted to make sure I didn’t screw up it up. Just enough fuel line was included in the kit, so it definitely paid off for me to measure twice and cut once. The new lift pump’s construction is far stouter than the stock unit, and it is rated to supply superior pressure and fuel flow.
The filtration system, which is part of the new lift pump assembly, utilizes independent fuel filter and water separator canisters. These canisters provide a much finer filtration than stock and are good for at least triple the service life of the stock fuel filter. That alone will save a decent amount of money down the road.
The fuel pressure gauge installation was a bear to get right. I decided to go with an electronic gauge instead of a mechanical gauge to minimize potential fuel leaks. Wiring the gauge into the truck was a finicky job because I had to remove the delicate dash bezel in order to tap into to a power wire on the light dimmer switch. Thankfully I didn’t end up cracking the plastic bezel.
I placed a “T” fitting into the fuel line going from the lift pump to the injector pump. This allowed me to capture an accurate fuel pressure reading from the lift pump. I placed a needle valve and a “snubber” valve in the small diameter fuel line running from the “T” fitting to the gauge’s electronic sending unit. These two valves are in place to dampen the rapid pressure pulses from the injector pump, which are known to prematurely kill electronic sending units.
After bleeding the fuel system of air, the engine sprung into life. The fuel pressure gauge indicated a healthy 16-17 PSI from the lift pump. After a test drive, I checked for fuel leaks and tightened up fuel line fittings as needed. With that, the fuel system was complete!
SECTION COST: $917.04
Drivetrain
With the truck being two-wheel-drive, maintaining the drivetrain is about as simple as it gets. The rear axle and transmission were due for fresh fluids and I was happy to oblige. Removing the cover plates for each component would allow me to inspect the insides and analyze their general condition.
Popping the off the differential cover resulted in a thick black oil pouring out. Even though the fluid looked well-used, there were no nasty metallic flakes waiting for me inside. Actually, the ring gear and differential looked great.
The Dana 80 axle that the truck is equipped with utilizes a limited slip differential, which means that a friction modifier must be mixed with the gear oil upon fill up. The friction modifier will prevent binding and chattering from the rear end, especially when negotiating a turn.
I took the opportunity while everything was apart to clean and repaint the differential cover and bolts. With a new cover gasket fitted up and the fluid topped off, this axle is good to go.
The transmission fluid service was up next. The fluid that came out had a healthy-looking transparency. I removed the PTO cover plates from both sides of the transmission and inspected the gears inside. I have to say, it looked brand new. Not too shabby for a six-speed transmission with nearly 300,000 miles.
I placed new sealant on the PTO covers and bolted them back up. Now came the fun part of refilling the transmission. The easiest way I found to refill the transmission was to do it from inside of the truck, through the top of the transmission.
With the center console removed and the shift lever out of the way, you get a direct shot to the top of the transmission. In went six quarts of fresh synchromesh transmission fluid.
The new transmission oil made gear changes smoother with less perceived notchiness than before. While it’s not as communicative as a sports car’s six-speed transmission, rowing through the gears on a massive vehicle such as this can still put one heck of a grin on your face.
SECTION COST: $219.12
Engine
The engine didn’t need much of anything, which is the beauty of the Cummins diesel. However, I did go ahead and change the oil and filter on the 1,100 pound iron beast. Guess how much oil this thing takes?
Eleven quarts. Eleven. The oil filter takes a whole quart in itself.
That sort of quantity is not unheard of for diesel pickups or even dry-sump performance vehicles. But, when you’re used to your gasoline daily-driver, it still provides a bit of a shock factor.
While topping off the oil, I noticed something odd: A bolt was missing from the exhaust header. I thought the worst, “Oh God someone broke a bolt off in the cylinder head. Nope, I didn’t see that...”
But, I did see it, which meant I had to look deeper into the situation. I shined a flashlight into the hole, and to my surprise, the bolt apparently had just fallen out. Phew!
After doing some research, I found that this is a common thing to occur on these engines - the bolt just rattles out. No big deal. I picked up a new bolt and spacer and torqued them down to spec. I also went through and re-torqued the rest of the header bolts for good measure.
SECTION COST: $85.00
Steering and Suspension
The second-generation Dodge Rams are notorious for developing sloppy steering, and a lot of this comes down to the suspension and steering joints routinely wearing out. When the heavy Cummins engine is up front, the joints tend to wear out even faster.
Upon doing a thorough inspection of the front end, I found that the ball joints and tie rod ends were toast. The truck was fitted with ball joints that were riveted to the control arms (because Chrysler). I elected to remove the rivets and replace the ball joints independently from the control arms because the control arm bushings and other components were in otherwise fine condition. The new ball joints simply bolt onto the control arms which provides future serviceability.
The ball joint replacement is a doable job for the DIY home mechanic without needing to outlay a ton of money for a professional-grade pneumatic tool system. Just grab a good drill, some drill bits, and rope off a solid weekend to give yourself enough time.
The tie rod ends had split boots which were spewing grease out the side. There was about an inch of play in one of the wheels when I gripped it and moved it side-to-side. Definitely time for some new parts. Compared to the ball joints, replacing the tie rod ends was a breeze.
Following the installation of the new joints, a professional alignment was performed to ensure the wheels were pointing in the right direction. The steering not only felt much tighter, but the truck’s handling felt far safer overall.
SECTION COST: $474.68
Brakes
While the front end was apart, it gave me the opportunity to check out the front brakes. Well, they looked ripe for replacement. The rotors had a nice lip forming and the pads didn’t have much friction material left. With a vehicle as heavy as this Ram is, you don’t want to be stingy with the brakes.
With new pads and rotors fitted, the brakes were nearly back to spec. The last thing left to do was to flush the entire brake system and cycle in some fresh brake fluid. With the new fluid in, the brake pedal had a firm feel and the braking performance out on the road was improved significantly.
SECTION COST: $134.99
Electrical
The electrical system on the second-generation Ram is hit and miss. Overall, everything was working well on this truck. Window switches and locks were operational, dash lights illuminated correctly, and all exterior lights turned on when prompted. However, the alternator warning light turned on once while I was driving. I pulled into a parking lot and turned the truck off. Upon restarting, everything appeared to be fine again. Not exactly confidence inspiring.
I ran a load test on the alternator and the batteries (yes, plural, there are two batteries) and all three items turned out to be under-performing. While replacing these items wasn’t difficult, it was somewhat costly. At least now I’ll have peace of mind when it comes to the truck’s charging system.
SECTION COST: $423.98
Cosmetic & Miscellaneous
With most of the major mechanical issues sorted, it was time to focus on the less critical aspects of the truck. The first item on the list was the air conditioning which had managed to stop working in the time since I purchased the truck.
I saw that the compressor clutch was still engaging properly, but when I crawled under the truck, I discovered the real culprit. There was a sizable leak originating from one of the A/C hard lines feeding into the compressor. It was safe to say that all the refrigerant gas had vacated the system.
I cleaned the area, unbolted the hard line from the compressor, and slipped on two new sealing washers. After bolting it back up, I went into the engine bay and located the A/C accumulator.
Whenever the A/C system is opened up, the accumulator should be replaced. Once the new accumulator assembly was installed, I took the truck to a shop so that they could vacuum the system to ensure no leaks were present. They then filled the system back up with R-134a refrigerant gas. The A/C system now works like new.
There was a poorly-executed repair that had been made to the passenger-side front fender. Someone had filled in a dent with a heap of body filler. They then masked off the area to be painted which in turn created some hard masking lines. I honestly think it would have looked better if they had just left the dent alone. Anyway, I set out to at least make the area look more presentable.
I sanded away the nasty looking paint and the heaped-on body filler so that it was flush with the original lines of fender. Once satisfied with the contour, I laid some primer down. I followed this up with some fine-grit sanding to smooth out the finish. I then applied a few coats of color-matched white paint, which was then followed up with a few coats of clear. While not perfect, the end result is decent for an inexpensive rattle-can repair.
The last item on the cosmetic list of repairs were the headlights. The original headlight lenses were foggy and yellowed. I tried the polishing methods that usually work to clear plastic lenses, but these lights were simply too far gone.
Luckily, a pair of brand new headlight housings can be picked up for under $70. This is a simple repair that has a huge effect on the truck’s overall appearance. It could also be considered a safety enhancement for night time driving.
SECTION COST: $213.59
Stuff I Didn’t Do
Many of you may be wondering why some maintenance procedures were left out of this write up. Well, here’s where a caring previous owner comes into play. I had receipts documenting dates and mileages for a valve adjustment, a cooling system flush, and a power steering fluid exchange.
Eventually, I will get around to doing these items, but for now, the mileage or time intervals have not been exceeded. Keep in mind that these are areas that certainly need attention if you have no documentation for the last time the services were performed.
The Figures
Repairs & Maintenance Total: $2,468.40
Truck Purchase Price: $5,300.00
Labor Hours: 50
GRAND TOTAL: $7,768.40
When I bought this truck, I didn’t set out to completely go through the thing. But, as with any used vehicle purchase, the more you drive it, the more you begin to see all the areas that need attention. Some of the items weren’t critical, like the cosmetic repairs, but some parts were in dire need of replacement, such as the ball joints.
The engine, however, hardly needed a thing. The Cummins diesel has a stellar reputation for a reason. With 271,000 miles currently on the truck, many would say the engine has a long life ahead of it. If treated to routine maintenance, there’s no reason why it can’t keep chugging along. But, again, the engine is only as strong as the weakest link, and that weak link is the truck which it resides in.
Here’s to hoping that all these repairs have made this Ram a team player for a long time to come.
Tidak ada komentar